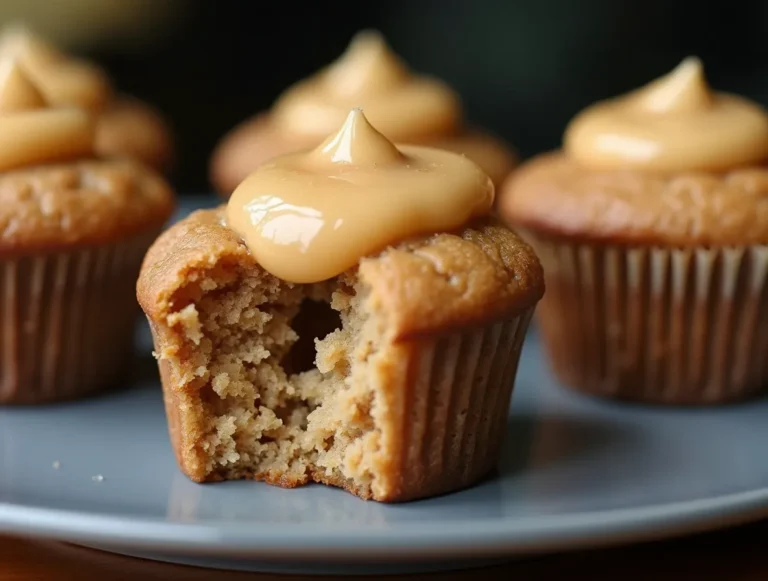
Sweetened Condensed Milk Snowball Cookies – 5-Minute Prep!
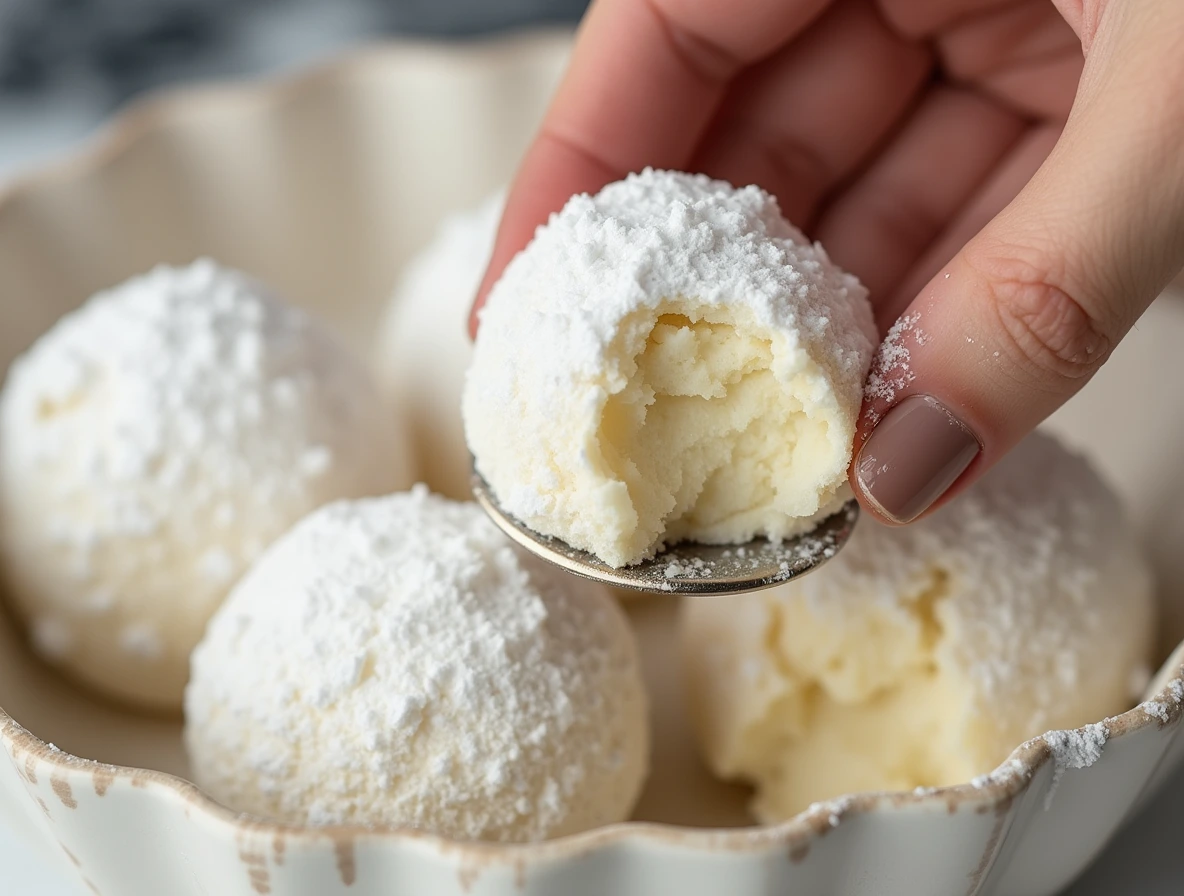
Table of Contents
Introduction: A Cookie with Centuries of History
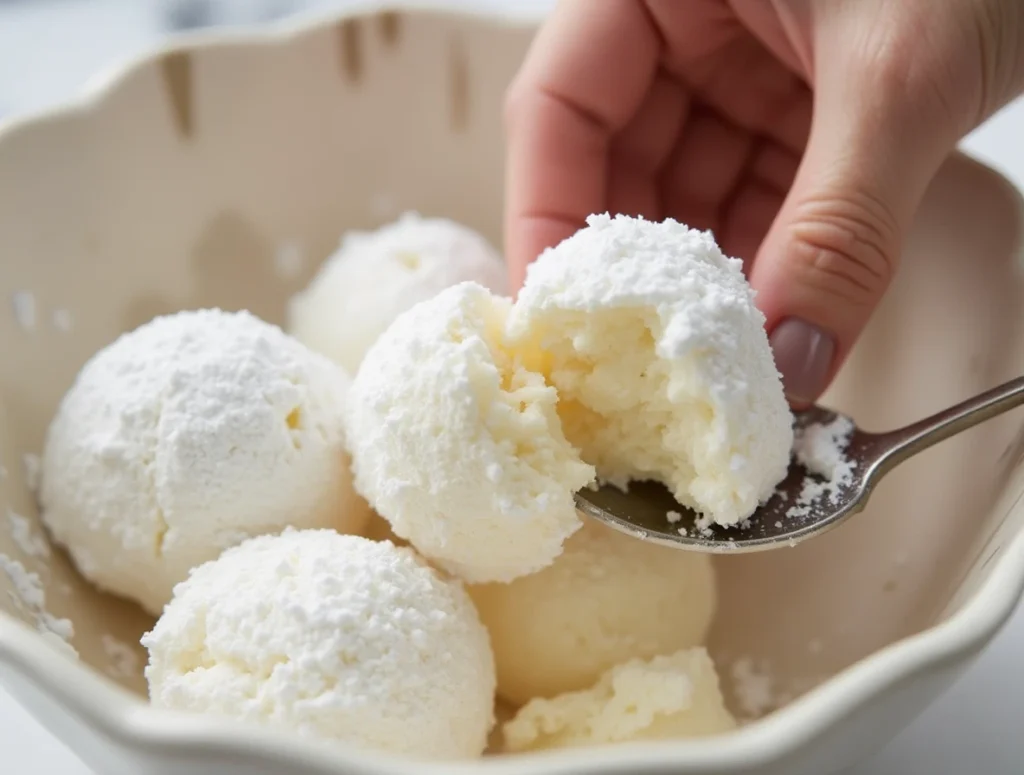
There’s something truly magical about biting into a perfectly made sweetened condensed milk snowball cookies. That initial powdery sugar coating gives way to a buttery, melt-in-your-mouth interior that has made these treats a beloved holiday tradition across cultures. What many don’t know is that these delicate confections trace their origins back to medieval Arab cuisine, where they were originally sweetened with honey and exotic spices before evolving into the powdered sugar-dusted delights we know today.
Our version of this timeless classic incorporates sweetened condensed milk for an extra layer of richness and creaminess that sets it apart from traditional recipes. The addition of this magical ingredient transforms what is already a delicious cookie into something truly extraordinary – maintaining that perfect crumbly texture while adding a subtle caramelized sweetness that will have your guests begging for the recipe.
Beyond their incredible taste, these cookies offer several practical advantages that make them perfect for holiday baking:
- Remarkably simple to make with just 7 basic ingredients
- No special equipment required – just a bowl and spoon will do
- Perfect for gifting as they stay fresh for weeks
- Highly adaptable to various dietary needs and flavor preferences
Whether you’re a seasoned baker looking for a new twist on a classic or a beginner wanting to impress at your first holiday cookie exchange, these sweetened condensed milk snowball cookies are guaranteed to become a new family tradition.
Why These Sweetened Condensed Milk Snowball Cookies Will Become Your New Holiday Obsession
1. The Secret Ingredient That Changes Everything
The addition of sweetened condensed milk to this recipe isn’t just a minor tweak – it’s a complete game changer that elevates these cookies to new heights. Here’s what this magical ingredient brings to the table:
- Unparalleled Moisture: Unlike traditional recipes that can sometimes turn out dry, the condensed milk ensures every bite is perfectly tender.
- Caramelized Sweetness: The cooked milk sugars add a complex flavor profile that regular sugar alone can’t achieve.
- Binding Power: Helps hold the cookies together without making them tough, creating that perfect meltaway texture.
- Time Saver: Eliminates the need to cream butter and sugar separately, simplifying the process.
2. Cost-Effective Holiday Magic
During the holiday season, specialty cookies can cost a small fortune at bakeries and gourmet stores. Our homemade version offers significant advantages:
- Budget Friendly: A batch of 24 cookies costs about $4 to make versus $15+ for store-bought.
- Quality Control: You control the ingredients – real butter, premium nuts, and no preservatives.
- Quantity: Perfect for large gatherings or gift-giving without breaking the bank.
3. Endless Customization Possibilities
One of the greatest joys of this recipe is how easily it adapts to different tastes and occasions:
- Nut Variations: Try pecans, walnuts, almonds, or even pistachios for different flavor profiles.
- Seasonal Twists: Add citrus zest in winter, lavender in spring, or pumpkin spice in fall.
- Color Themes: Mix food coloring into the powdered sugar coating for festive hues.
- Dietary Adaptations: Easily made gluten-free or vegan with simple substitutions.
The Science Behind the Perfect Snowball Cookies
Understanding the technical aspects of this recipe will help you achieve consistent, bakery-quality results every time:
The Role of Each Ingredient
- Butter: Provides structure and that signature meltaway texture. Must be properly softened (65°F ideal).
- Sweetened Condensed Milk: Adds moisture, sweetness, and helps bind without gluten development.
- Flour: All-purpose gives the perfect balance of tenderness and structure.
- Nuts: Contribute flavor, texture, and help absorb excess moisture.
- Powdered Sugar Coating: Creates the snowy appearance while adding sweetness.
Temperature Control is Key
- Butter Temperature: Too cold and the dough won’t cream properly; too warm and cookies will spread.
- Chilling Time: Allows the flour to fully hydrate and fats to firm up for better texture.
- Baking Temperature: 350°F is ideal for even cooking without excessive browning.
Ingredients: Quality Matters
Wet Ingredients:
- 1 cup (230g) unsalted butter, softened to room temperature (European-style preferred)
- ½ cup (120ml) high-quality sweetened condensed milk (look for brands with real sugar)
- 1 tsp pure vanilla extract (or ½ tsp vanilla bean paste for extra flavor)
Dry Ingredients:
- 2 cups (250g) all-purpose flour (measured by weight for accuracy)
- ¼ tsp fine sea salt (enhances all the flavors)
Mix-Ins & Coating:
- 1 cup (100g) premium pecans or walnuts, toasted and finely chopped
- 1½ cups (180g) powdered sugar, divided (for initial and final coating)
Optional Enhancements:
- ½ tsp ground cinnamon or cardamom
- 1 tbsp citrus zest (orange, lemon, or lime)
- ¼ tsp almond extract (complements the nuts beautifully)
- Edible glitter or gold dust for special occasions
PS: learn more about unrefined sweeteners
Step-by-Step Perfection: The Ultimate Guide
1. Preparing the Dough (The Foundation)
- Creaming Process:
- In a stand mixer with paddle attachment, beat softened butter on medium for 2 minutes until creamy and pale.
- Gradually add sweetened condensed milk in 3 additions, beating for 1 minute after each.
- Mix in vanilla extract and any optional flavorings until fully incorporated.
- Incorporating Dry Ingredients:
- Whisk flour and salt together in a separate bowl to ensure even distribution.
- Add to butter mixture in 3 batches on low speed, mixing just until combined.
- Fold in toasted nuts by hand using a silicone spatula for even distribution.
2. The Crucial Chilling Stage
- First Rest:
- Cover bowl with plastic wrap pressed directly on dough surface.
- Refrigerate for 30 minutes to allow gluten to relax and flavors to meld.
- Portioning:
- Use a #60 scoop (1 tbsp) for uniform 1-inch balls.
- Roll between palms to smooth any cracks for perfect spheres.
- Second Chill (Optional but Recommended):
- Arrange shaped cookies on parchment-lined tray.
- Chill 15 minutes before baking for optimal shape retention.
3. Baking Like a Pro
- Oven Setup:
- Position rack in center of oven.
- Preheat to 350°F (175°C) for at least 20 minutes.
- Line baking sheets with parchment or silicone mats.
- Spacing:
- Place cookies 2 inches apart to allow for slight spreading.
- Bake in batches to prevent overcrowding.
- Baking Time:
- 12-15 minutes until bottoms are lightly golden.
- Tops should remain pale – don’t overbake!
4. The Signature Double Coating
- First Coating:
- Let cookies cool just until handleable (about 5 minutes).
- Roll gently in ½ cup powdered sugar while still warm.
- Cooling Completely:
- Transfer to wire rack to prevent steaming.
- Second Coating:
- Once completely cool, roll again in remaining sugar.
- For extra snow effect, dust with additional sugar through a fine sieve.
Professional Presentation Tips
Take your snowball cookies from homemade to haute cuisine with these pro techniques:
- The Perfect Display:
- Arrange on a tiered stand with varying heights
- Alternate with fresh cranberries or rosemary sprigs for color contrast
- Gift Packaging Ideas:
- Cellophane bags tied with velvet ribbon
- Decorative tins layered with parchment
- Mini mason jars for a rustic look
- Special Touches:
- Lightly spray with edible pearl luster dust
- Add a single edible silver dragée to each
- Tie with personalized recipe tags
Expert Troubleshooting Guide
Even experienced bakers encounter issues – here’s how to solve common problems:
Problem: Cookies spread too much
- Cause: Butter too warm or insufficient chilling
- Fix: Chill dough longer; ensure oven is properly preheated
Problem: Cookies are dry/crumbly
- Cause: Overbaking or too much flour
- Fix: Measure flour by weight; reduce bake time by 1-2 minutes
Problem: Sugar coating melts in
- Cause: Coated while too hot
- Fix: Let cool slightly longer before first coating
Problem: Nuts taste bitter
- Cause: Possibly rancid or over-toasted
- Fix: Always taste nuts before using; toast at 325°F for 8-10 minutes only
Advanced Flavor Variations
Once you’ve mastered the basic recipe, try these gourmet twists:
1. Chocolate Hazelnut Snowballs
- Replace ¼ cup flour with cocoa powder
- Use toasted hazelnuts instead of pecans
- Add 1 tbsp Frangelico liqueur to dough
2. Matcha White Chocolate
- Add 1 tbsp matcha powder to flour mixture
- Fold in ½ cup chopped white chocolate
- Dust with matcha-sugar blend
3. Spiced Chai Snowballs
- Add 1 tsp chai spice mix to dough
- Replace vanilla with ½ tsp orange blossom water
- Coat with cinnamon sugar mixture
Nutritional Information & Dietary Adaptations
Standard Recipe (Per Cookie):
- Calories: 145
- Fat: 9g
- Carbs: 14g
- Protein: 2g
Gluten-Free Version:
- Replace all-purpose flour with:
- 1 cup almond flour
- ¾ cup gluten-free 1:1 baking flour
- ¼ cup tapioca starch
- Add ½ tsp xanthan gum
Vegan Adaptation:
- Use plant-based butter sticks
- Substitute sweetened condensed coconut milk
- Replace egg wash with aquafaba if needed
Lower Sugar Option:
- Reduce condensed milk to ⅓ cup
- Use erythritol powdered sugar alternative
- Increase vanilla to boost perceived sweetness
The Perfect Pairings: Serving Suggestions
Beverage Companions:
- Coffee: Try with a cinnamon-spiced latte
- Tea: Earl Grey or mint herbal blends
- Dessert Wines: Moscato or ice wine
- Spirits: Pair with amaretto or bourbon
Plating Ideas:
- Cookie Trio: Snowballs with chocolate crinkles and gingerbread
- Ice Cream Sandwich: Between two small cookies
- Cheeseboard: With blue cheese and dried fruits
- Dessert Charcuterie: As part of a sweet spread
Storage & Preservation Methods
Short-Term Storage:
- Room temperature in airtight container: 2 weeks
- Refrigerated: Up to 3 weeks (bring to room temp before serving)
Freezing Options:
- Dough Balls:
- Freeze unbaked on sheet pan
- Transfer to bags for up to 3 months
- Bake frozen, adding 2-3 minutes
- Baked Cookies:
- Freeze in single layers between parchment
- Thaw at room temperature 1 hour
- Refresh with new powdered sugar coating
Reviving Stale Cookies:
- Place in 300°F oven for 2-3 minutes
- Or microwave with cup of water for 10 seconds
The History of Snowball Cookies
Understanding the origins of these Sweetened Condensed Milk Snowball Cookies adds depth to your baking experience:
Global Journey:
- Middle Eastern Roots: Originated as ghraybeh in medieval Arab cuisine
- European Adaptation: Became known as Russian tea cakes
- Mexican Version: Polvorones with added cinnamon
- American Twist: Popularized as wedding cookies
Cultural Significance:
- Traditionally served at celebrations and holidays
- Symbolize prosperity and good fortune
- Round shape represents unity and eternity
Frequently Asked Questions
Q: Can I use evaporated milk instead of sweetened condensed milk? A: No – they’re not interchangeable. Evaporated milk is unsweetened and will drastically alter the texture.
Q: Why do my cookies crack when rolling? A: This usually indicates the dough is too cold. Let sit at room temp for 5 minutes before shaping.
Q: Can I make these without nuts? A: Absolutely! Replace with an equal amount of toasted coconut or additional flour.
Q: How do I prevent powdered sugar from making a mess? A: Roll cookies in a deep bowl or use a paper bag for shaking.
Q: Can I pipe this dough for different shapes? A: The dough is too crumbly for piping – it’s best suited for hand-rolled balls.
Final Thoughts: Sweetened Condensed Milk Snowball Cookies More Than Just a Cookie
These sweetened condensed milk snowball cookies represent the perfect intersection of tradition and innovation. By honoring the classic techniques while incorporating modern shortcuts and flavor profiles, we’ve created a recipe that respects the past while embracing contemporary baking sensibilities.
What makes these cookies truly special isn’t just their delightful texture or beautiful appearance – it’s the way they bring people together. There’s something profoundly comforting about sharing these powdered sugar-dusted treasures with loved ones, continuing a culinary tradition that spans centuries and continents.
As you bake your own batches, remember that you’re participating in a global baking heritage. Whether you stick to the classic recipe or create your own signature variation, these cookies will undoubtedly become a cherished part of your holiday traditions for years to come.
For more inspiring dessert ideas, explore our dessert collection, where tradition meets innovation in every bite.

Sweetened Condensed Milk Snowball Cookies
Ingredients
Wet Ingredients:
- 1 cup 230g unsalted butter, softened
- ½ cup 120ml sweetened condensed milk
- 1 tsp vanilla extract
Dry Ingredients:
- 2 cups 250g all-purpose flour
- ¼ tsp salt
- Mix-Ins & Coating:
- 1 cup 100g finely chopped pecans or walnuts
- 1½ cups 180g powdered sugar (for coating)
Optional Add-Ins:
- ½ tsp cinnamon or almond extract
Instructions
Prepare the Dough:
- In a large bowl, beat softened butter until creamy (~2 minutes).
- Add sweetened condensed milk and vanilla; mix until smooth.
- Gradually add flour and salt, mixing just until combined. Fold in chopped nuts.
Chill the Dough:
- Cover and refrigerate for 30 minutes (ensures easy rolling).
Shape & Bake:
- Preheat oven to 350°F (175°C). Line a baking sheet with parchment.
- Roll dough into 1-inch balls; place 1 inch apart on the sheet.
- Bake for 12–15 minutes until bottoms are lightly golden (tops stay pale).
Coat & Serve:
- Let cool 5 minutes, then roll warm cookies in powdered sugar.
- Cool completely, then coat again for a snowy finish.
Notes
- Storage: Keep in an airtight container for up to 1 week.
- Freezing: Freeze unbaked dough balls for 3 months or baked cookies for 2 months.
- Substitutions: Use gluten-free flour or omit nuts for allergies.
- Pro Tip: For extra flavor, toast nuts before chopping.